When connecting my account I received a "Blogger isn't playing nicely; it's giving ScribeFire an error". If you would like more information on this issue see my post entitled "Can't publish to Blogger".
Sunday, May 31, 2015
Blogger isn't playing nicely; it's giving ScribeFire an error: May 2015
When connecting my account I received a "Blogger isn't playing nicely; it's giving ScribeFire an error". If you would like more information on this issue see my post entitled "Can't publish to Blogger".
Saturday, May 30, 2015
Installing DNS on Linux 7 (Redhat, Centos, Oracle Linux)
When Building a home network, one of the first servers I like to build is a dns server. This server saves me time from going from multiple machines and entering host records to keep my servers talking to each other by name. In a small home network I will usually build the following servers all on a single server to save resources, a dns server, a yum repository server, a version control system and a file server. I will not usually share a web server or database server on a single server but I have found that these other application can share a small single instance and help my productivity working in my home network. I can build two different internal dns servers and run them easily on two small virtual boxes on two different low end machines. this keeps redundancy but is not necessary. A work around for not building a dns server in a home testing network is to just add individual records in the host entry for each machine that needs to communicate.
Here's a quick tutorial on how I set up my home dns server.
I will be using Oracle Linux 7 but Centos and Red Hat 7 will work the same way.
1. Copy my Linux Base Install Clone.
Follow my previous tutorials to show how to install Linux 7 and clone an instance with a base install.
2. Update the current clone to the latest patchset on all software.
yum update -y
Windows Live Writer Blogger Issue Work Around 2
1. Design your post in Windows Live Writer, using all the tools you are used to.
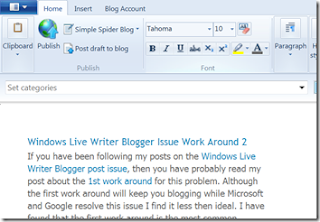
2. Install Windows Live Mail.
Follow this Link to "Install Windows Live Mail".
3. Configure Windows Live Writer to work with your Gmail account.
Follow this Link to "Configure Windows Live Mail for Gmail".
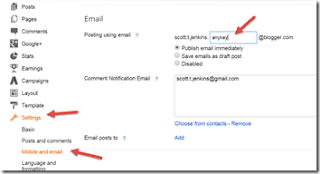
4. Next you will set you blogger to allow you to publish new posts by email.Login into blogger.
Select Settings on your blog and choose Mobile and email settings.
Under Post using email Create a unique key that only you will know. In my example I called it anykey but you'll want to make it more complex.
Choose Publish email immediately.
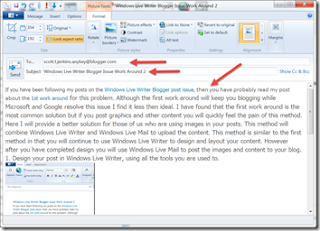
5. Create a new email to the email address previously configured in my example it would be scott.t.jenkins.anykey@blogger .com
Make the subject the post title.Copy your post from the edit screen in Windows Live Writer and paste it into the body. You do not need to modify it the email will upload images for you.
6. Send the email.
Configure Windows Live Mail for Gmail
Although Gmail can be set up and used completely from a browser you may have reason to use a standard email client. Windows Live Mail provides a free email client to use with most mail providers.
This tutorial will explain how to configure Gmail to work with Windows Live mail giving you an email client on your desktop instead of being forced to use the sometimes clumsy browser.
If you do not have Windows Live Mail currently configured follow my previous tutorial on installing Windows Live Mail.
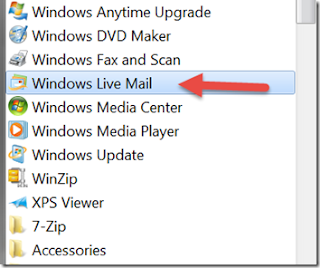
1. Open Windows Live Mail from start programs.
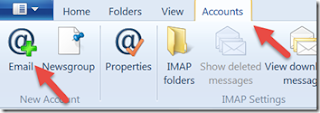
2. Select Accounts and then choose the "+Email" icon
3. Enter your Gmail account configuration, you'll need your Gmail email address, password and a display name.
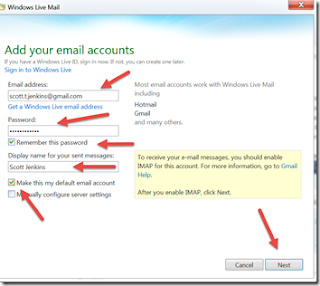
4. Once you have completed the email configuration it may take a while for Gmail to download and set up all your email configurations depending on the quantity of emails you have. Be patient, and you'll soon have a working email client.
Install Windows Live Mail
You can use Windows Live mail to mange your exchange accounts, Gmail, Hotmail and many other email accounts. The email client is simple and easy to use but lacks some of the features that the full featured Outlook client has.
Windows Live Mail comes in the Windows Essentials package.
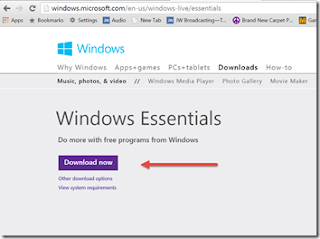
1. Down load the Windows Essentials installer.Windows Live Essentials Download
2. Run the Installer
.
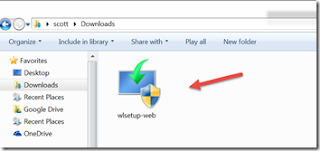
2.1 A user account access control box may popup, Choose Yes if it does.
A preparing to install screen will show up immediately after.
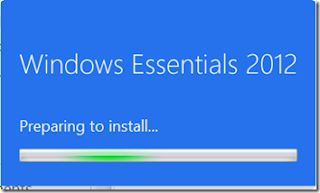
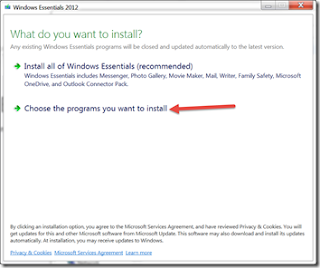
3. Choose Which software you want to install. You can choose all I simply choose the software I want because I am not a fan of Microsoft messenger and do not want it popping up on my screen. Most of the other tools are nice beginner level tools
.
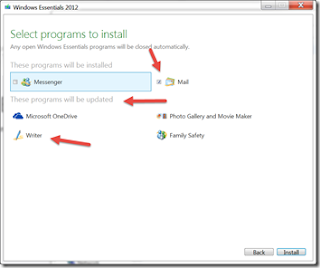
4. Any software you have already from the Essentials packaging will automatically be updated. Choose the Mail Option to install
.
5. The installing Windows Essentials 2012 screen will appear.
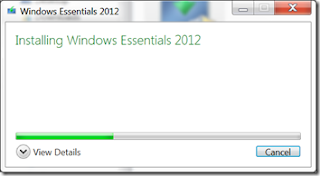
Once Complete click "Done" to close the installer.
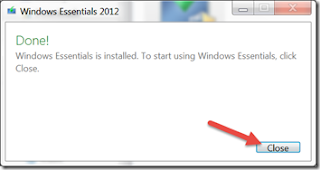
You'll now find Windows Live Mail in your programs section.
Windows Live Writer Blogger Issue Work Around 1
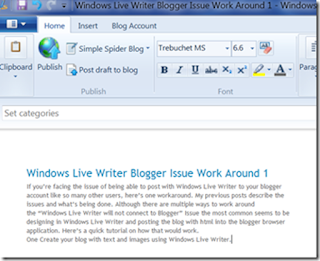
1. Create your blog with text and images using Windows Live Writer.
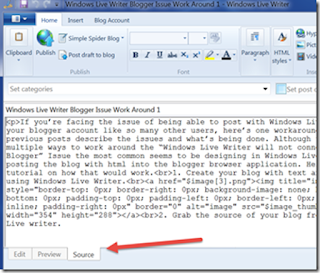
2. Grab the source of your blog from windows Live writer. Use Ctrl+A to copy all of the source from the source screen in Windows Live Writer.
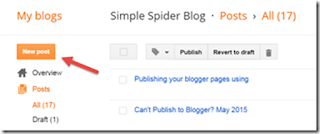
3. Copy your content into Blogger Web tool. Choose html format.
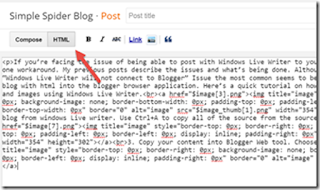
4. If you have images you’ll now need to upload images and update them in blogger. This is what I found the most difficult of this method.
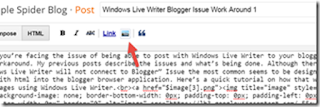
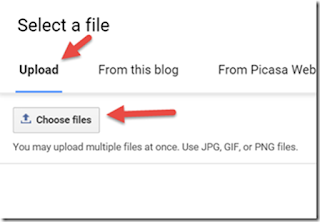
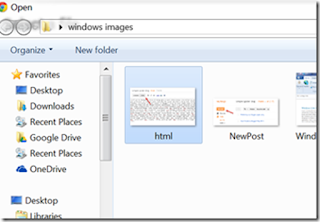
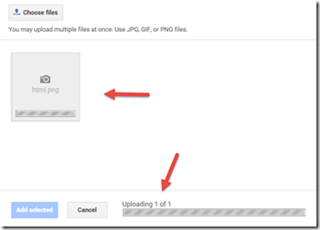
4.1 After your images are upload you’ll need to get each image url and replace it in the correct spot of your blog.
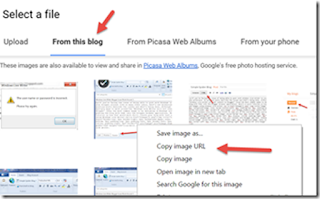

4.2 Repeat step 4 till all images have been update with your images on the blogger website.
5. Add a post title and click “Update”.

Can't Publish to Blogger? May 2015
Thursday, May 28, 2015
Google Response time slow
May 28th Google blocks auth method used by Windows Live writer
Tuesday, May 26, 2015
Blogger Search fails
Recently I ran into a problem where my search bar on the side of my blog failed to return results. No matter the search the blog returned “No Results”. It turns out this has been a repeating problem on blogger and I would not have even noticed it had I not been looking for an older post I created.
Blogger Help Forum Bug Info
Luckily there is a work around.
1. Add a gadget to your blog.
2. Choose “Html/javascript”
3. Enter in the content
“<form action="/search" name="input" method="get">
<input value=" " name="q" size="20" type="text"/>
<input value="Search!" type="submit"/>
</form>”
Save
4. Save Arrangement and view your site
You’ll once again have a working search box
Sunday, May 10, 2015
Install Wordpress on Oracle Linux 7
Wordpress is a popular blogging tools used for many different purposes. People use Wordpress as a blogging tool, a content management system, and even as a website management tool.
This tutorial will go over installing Wordpress on Oracle Linux 7.
Basics:
Install Oracle Linux 7.1 (follow articles describing cloning a base Linux install with Virtual Box or install the software directly)
Downloads: Wordpress
Additional Tools: Filezilla or other ftp client, SecureCrt/Putty or other ssh client
Steps:
1. Follow the steps to clone a new Linux Server.
2. Edit the hostname to a hostname you will understand
vi /etc/hostname
wordpress.simplepsider.com
3. Set the hostname the imp address to a static ip address. This will avoid problems in the future with connecting to clients after reboots.
ip addr
vi /etc/sysconfig/network/*/ifcfg-*
4. Patch your OS. Always patch your OS before installing web applications.
yum update
5. Reboot your system
reboot
6. Enable yum repo for mysql
vi /etc/yum.repos.d/public-yum-ol7.repo
find the ol7_MySQL56
change enabled to 1
7. Install software for wordpress.
#Web Server
yum install mod_ssl openssl httpd -y
# Php
yum install php php-mysql -y
# Database
yum install mysql-server -y
#install ftp server
yum install vsftpd -y
# Additional Tools zip program, locate program
yum install unzip -y
yum install mlocate -y
yum install wget -y
# Additional php libraries for wordpress tools
yum install php-gd -y
yum install php-xml -y
8. Start and enable database.
systemctl start mysqld
systemctl enable mysqld
9. start and enable web server
systemctl start httpd
systemctl enable httpd
10. Secure mysql database
mysql_secure_installation
Current Password (enter for none):
Set Password = Y
Enter Strong Password
Renter Password
Remove Anonymous user? = Y
Disallow root login remotely? = Y
Remove Test Database? = Y
Reload Prvileges? = Y
11. Create the wordpress database and account user.
-- Use a string password do not use MyPassword1 this is just an example
mysql -u root -p
CREATE DATABASE simplespider_prod;
GRANT ALL PRIVILEGES ON simplespider_prod.* TO wordpress@localhost;
SET PASSWORD FOR wordpress@localhost = PASSWORD('MyPassword1');
FLUSH PRIVILEGES;
exit
12. Download the latest version of wordpress.
cd ~
wget https://wordpress.org/latest.zip
13. Unzip wordpress
ls –lrt
unzip latest.zip
cd wordpress
cd /var/www/html
rm –rf *
cp ~/wordpress/* /var/www/html -R
14 Configure wordpress to connect to your database
cd /var/www/html
cp wp-config-sample.php wp-config.php
vi wp-config.php
define('DB_NAME', 'simpleprider_prod');
define('DB_USER', 'wordpress');
define('DB_PASSWORD', 'MyPassword1');
define('DB_HOST', 'localhost');
15. Disable firewall Note Later we can change rules to just allow port 80 and 443 through
systemctl stop firewalld
systemctl disable firewalld
16. Finish Wordpress set up through browser.
Enter the Ip you used on the network configuration into a browser.
This will redirect you to the wordpress admin page.
17. Enter your wordpress information
Title
Admin username
Password
Email
Click Install Wordpress
18. The completion screen will show up and you will be ready to start admining your new site.
19. After Login you will be taken to the Wordpress Admin screen
Wednesday, May 6, 2015
Windows Live Writer The operation has timed out.
Sometimes when posting a large post to blogger using Windows Live Writer you will receive a “The request was aborted: The operation has timed out.”. This seems to most commonly happen when publishing a large post with many graphics to a blogger site. Republishing the post multiple times almost always resolves this. I have found that I may need to publisher the post 4 to 5 times if I have over a dozen new images. I believe this is just a time out as it loads the images and that it does not need to reload the images each time. So subsequent posts fix this. I have not been able to find a place to increase the time out. So my solution is to be patient and post the post again.
Virtual Box Clone Instance.
Once you have a solid instance of the OS you want there is no reason to reinstall it again. For that matter you risk having differences or making mistakes when reinstalling. The ideal way to start new instances is to clone an existing good base install.
Open Virtual Box Manager
Highlight the instance you want to clone.
Right click your instance and choose “Clone”
Choose a name for your new instance and choose “Reinitialize the Mac address of all cards”. Select “Next”.
The choose clone type screen will appear. Choose Clone Type “Full Clone” and press “Clone”.
The progress bar will display.
Once Complete your new instance will show up in the navigation bar.


